
MKII Gauge Cluster LED Project
Almost a year ago I fabricated small LED arrays to fit into my personal gauge cluster and provided a nice even backlight. The LED arrays worked perfectly and I was very happy with the rewards of my labor, however, my design was complicated and very hard to mass produce. In the interest of my fellow Mr2 siblings I started the MKII Gauge Cluster LED Project whose purpose was to develop a cheap and uncomplicated way to backlight the Toyota Mr2's gauge cluster.
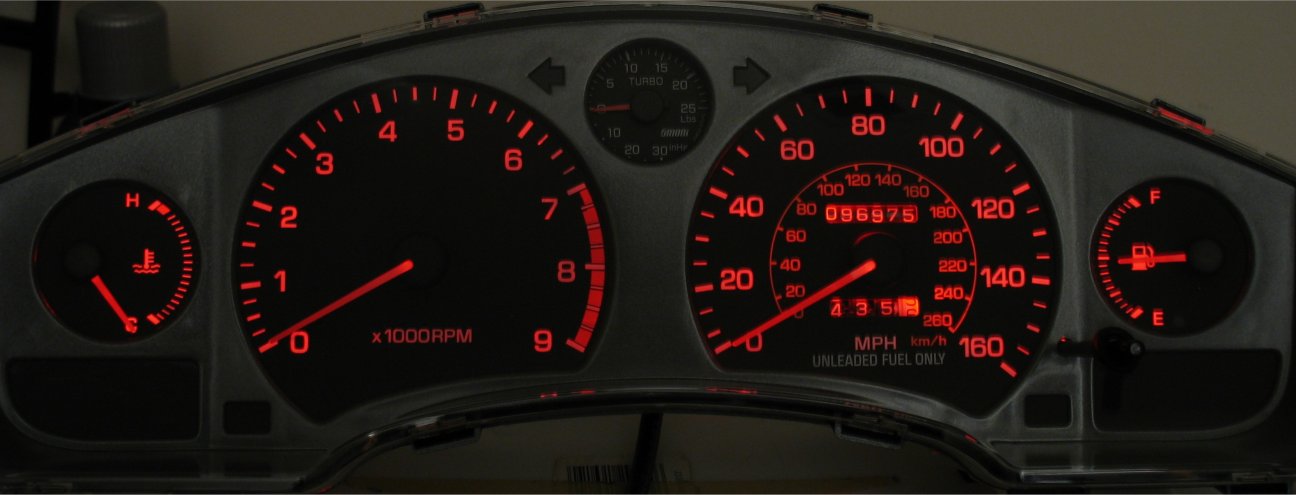
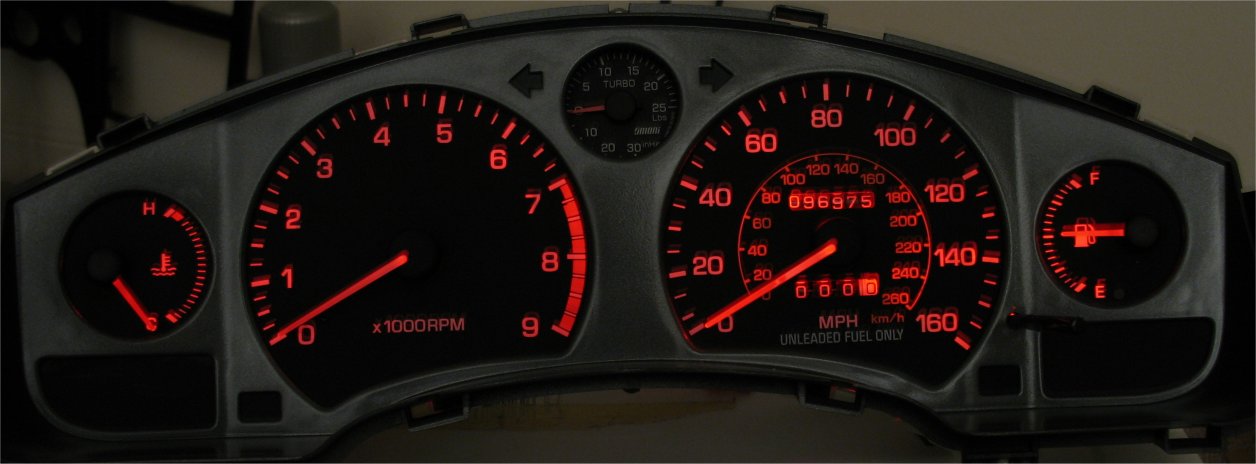
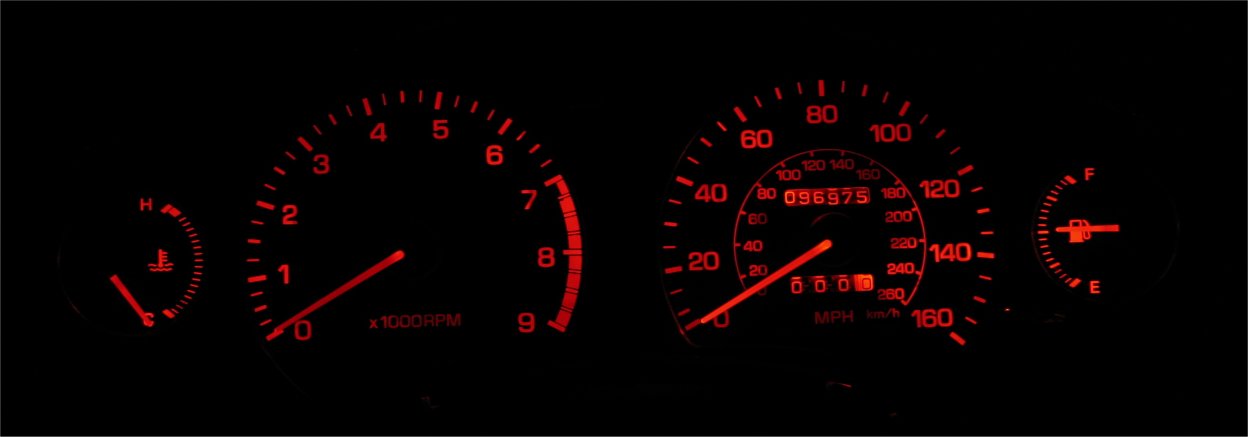
For this project I am using my 16 LED custom backlight as a control for my experiment. Here is a picture of the internals and what it looks like when it is turned on (please ignore the dark boost gauge as it is not stock and was turned off for the experiments).
In order for me to call this experiment a success I was determined to find a backlighting solution that met or exceeded the backlight quality of my personal cluster.
Facts:
#1) The stock cluster uses #194 bulbs with green sock-like covers to provide the backlighting.
#2) #194 bulbs provides a 360° light point sources in 4 locations spread across the cluster.
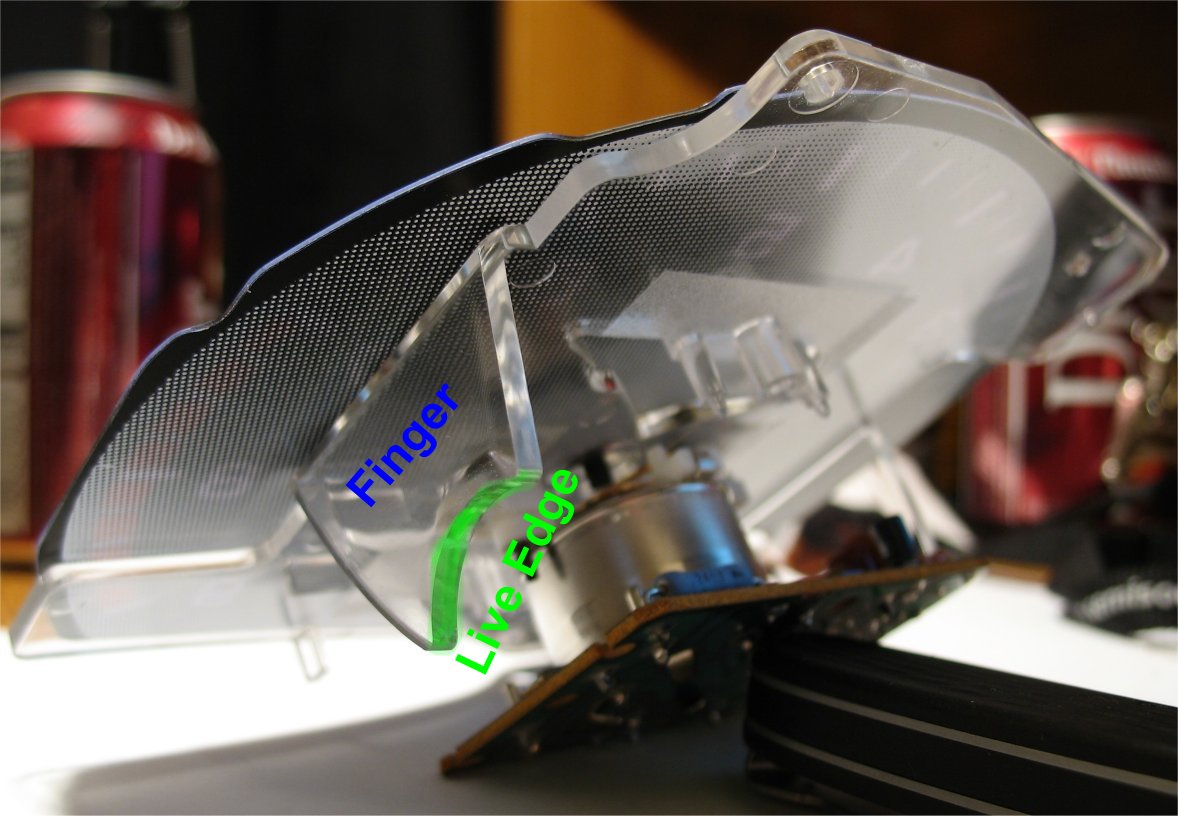
#3) The Mr2's gauge cluster uses a cleaver mix of translucent plastic and clear acrylic to evenly spread the light from a point source.
#4) The acrylic portion of the gauges receives the majority of it's light from "fingers" that are angled down towards the light sources the allows the acrylic's "live edge" to collect and spread light.
Materials and Theory:
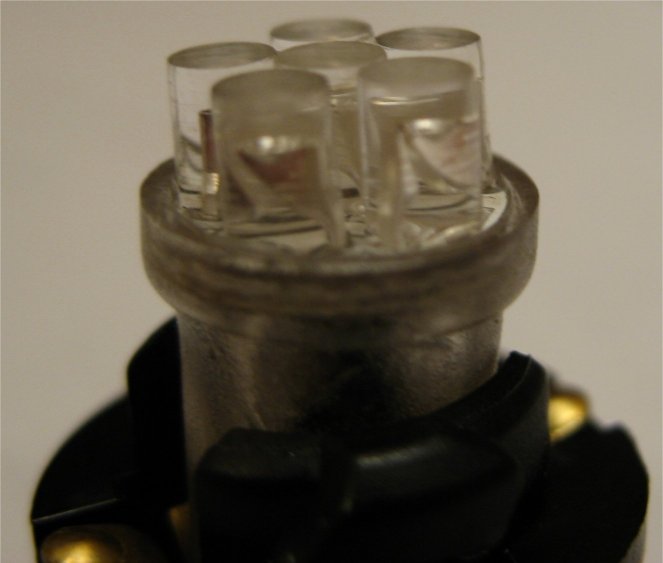
Early on I decided to use the WLED-x6 LED Wedge Base Bulbs from www.superbrightleds.com. I chose this #194 bulb replacement because it had the best ratio of vertical height to number of LEDs in the array. It's low vertical height (just under 2 cm) was important because it allows the light from the LEDs to expand into a wider beam before it hits the acrylic gauge fingers. Here's a picture of the WLED-x6 LED Bulb in the Mr2's stock light holder:
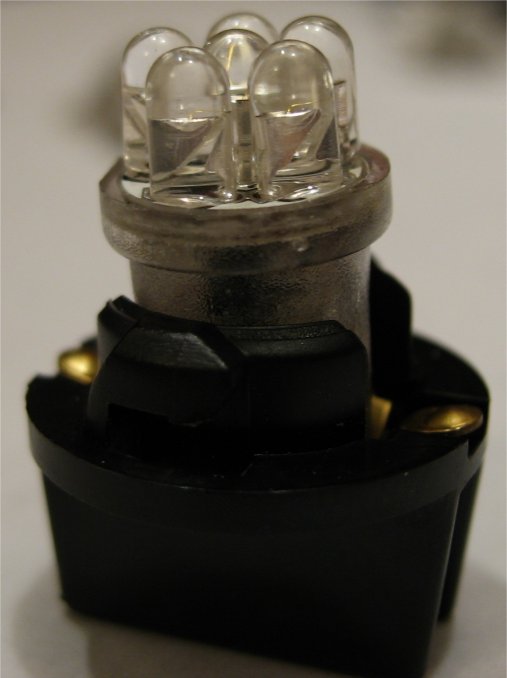
Unfortunately each LED in the WLED-x6 LED Bulb only has a 35° viewing angle, which makes for very sharp and extreme light beam. This means the fingers will not be able to collect an optimal amount of light to spread across each gauge face and will inevitably lead to hotspots. With this in mind, I started the think of ways to diffuse the beam into a much larger beam that would ideally be 180°.
My first idea was to use frosted acrylic (used in privacy glass) to diffuse the light beam into an ideal 180° beam.
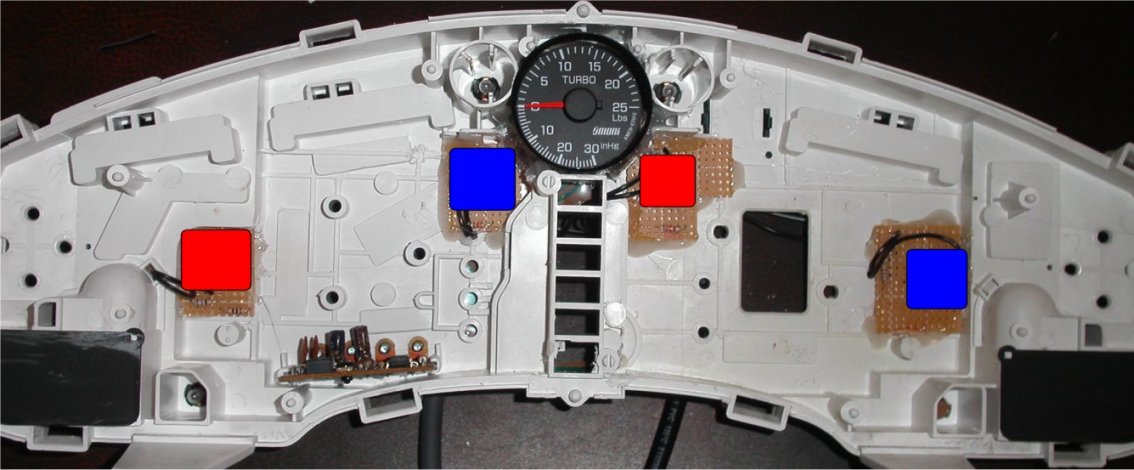
The colored squares represent diffused acrylic which is attached
(probably epoxied) to the top of the
WLED-x6
LED Wedge Base Bulbs. The LED + Acrylic Diffusers are directly below the
stock cluster's fingers so when the LEDs turn on the light diffuses into the
acrylic and provides a very wide light beam.
After buying a sheet of frosted acrylic I started the construction of the lights. Early in the process I discovered that acrylic was not helping to diffuse the beam and actually filtered the color of the LEDs into a nice pinky-red :(
I was disappointed in this setback and tried to come up with other ideas. After a while I realized I was straying from my original purpose to create a "cheap and uncomplicated " solution, so I went back to the drawing board. After thinking it over for a few days I remembered that some manufactures produce flat top LEDs that can produce beams as wide as 100°. Could it be this simple? I decided to find out by grinding the LEDs flat with my dremel and a sanding circle attachment. Pictures of the process are included below:

Results:
Below is a comparison pictorial of my results. The ordering of the comparison is as follows:
#1) My original 16 LED conversion (control).
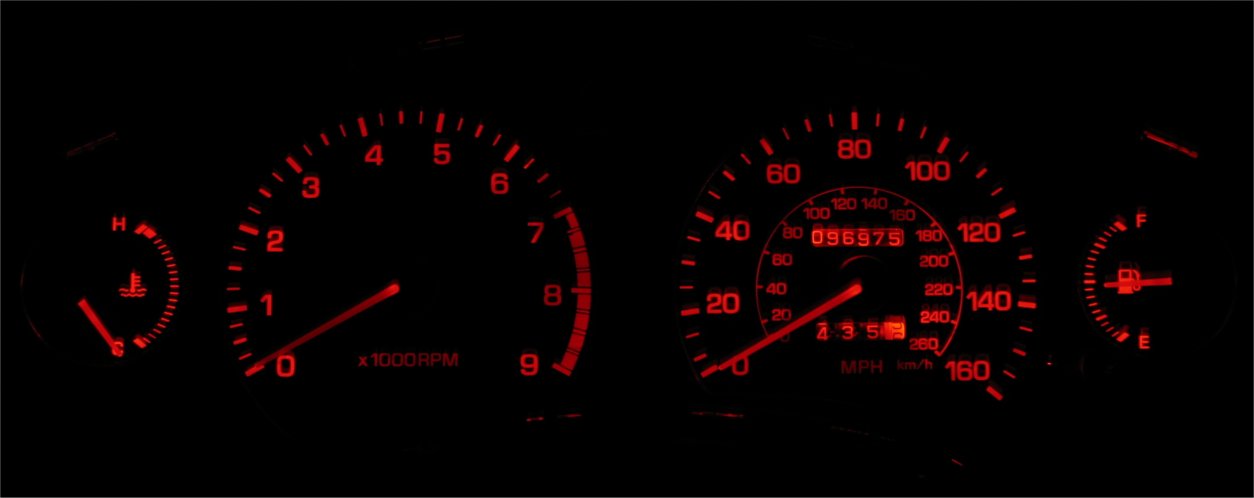
#2) WLED-x6 LED Bulbs with unmodified round tops (the right side of the gauge is unlit because I only had 3 unmodified WLED-x6 LED Bulbs to work with at the time).
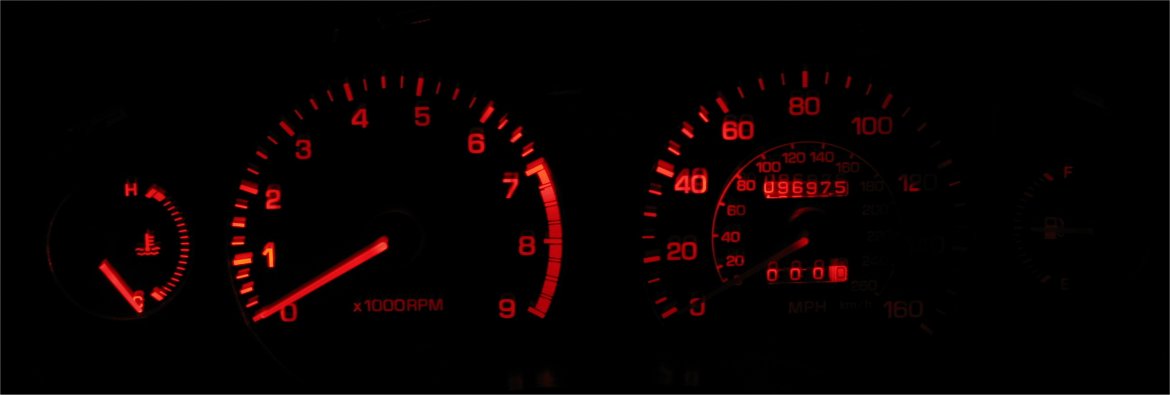
#3) WLED-x6 LED Bulbs with modified flat tops.
Other than cropping for size reasons these photos have not been enhanced or modified in any way.
First Set

Second Set
Final Thoughts
I am happy with the results of sanding the LEDs flat. While it is not perfect and minor dim spots exist (x1000RPM & MPH) this seems to be a very good solution to the MKII's gauge cluster backlighting problem. If you wish to do this modification, I would recommend using a 220 grit sanding wheel in combination with a dremel. Slowly grind the tops of the LED down to a flat surface and make sure you don't grind all the way down to the anode and the cathode (metal prongs in the middle of the LED).